Some facts:
- SQL Server Reporting Services were great in the past. SSRS 2008 are better.
- MSDN is great. MSDN has lots of details. Sometimes it’s too much if you are under pressure.
- Google usually gets me the information I want faster. Especially when I need to get something done quickly.
All in all this post is for those of you that need to learn how to use SQL Server Reporting Services fast or need to solve the above mentioned problem fast, without knowing too much about the details. I read a lot of and like these introductory posts and so now I’m writing another one, here goes.
I assume you have SQL Server Reporting Services already setup (by your grand one-and-only unmissable sys-admins or by yourself, but in the latter case you probably are not the target audience for this) and you have access to the all required tools. Talking about tools, there are three you should know of:
- RSConfigTool - (Start menu > SQL Server 2008 > Configuration > Reporting Services Configuration): What do I need it for: Troubleshooting, Finding Urls, Configuration Report Server. Having problems trying to connect. See Additional Tip #1.
- Report Manager - (http://<yourserver>/reports): What do I need it for: Managing your reports (you won’t actually see anything on a clean install yet)
- Business Intelligence Studio - (Start menu > SQL Server 2008 > SQL Server Business Intelligence Development Studio): What do I need it for: Creating and editing your reports
and of course you will need SQL Server Management Studio for managing the data the report is based upon.
(side note: This tutorial is based on the 2008 version, can’t say how many differences there are between this and the older versions.)
1. Create your views
There are ways to aggregate your data in the report itself, but it’s easier and cleaner to use SQL views to provide the data for the report and use Reporting Services only for the report. So go to SSMS and create your view.
2. Create a new BIDS (Business Intelligence Development Studio) solution based on the “Report Server Project” Template. Add a new report by clicking on the Report node in the Solution Explorer. Next we need to connect to a data source. Give it a name, click edit and connect to your database.
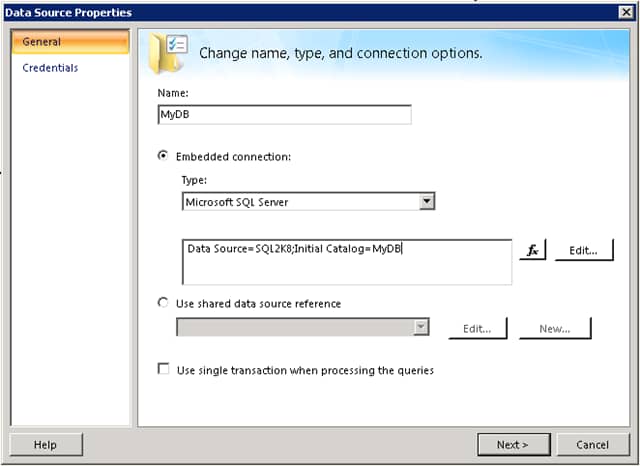
3. Click next and the Query Designer appears. Here you enter the T-SQL statement for your data. Ideally it’s just a “SELECT * FROM yourView” (or select each column distinctly). You can test it using ‘Run Query’. You can also choose to use data from a stored procedure if you like, just select the appropriate option.
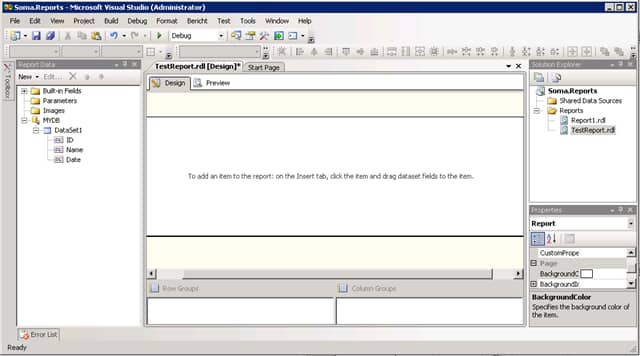
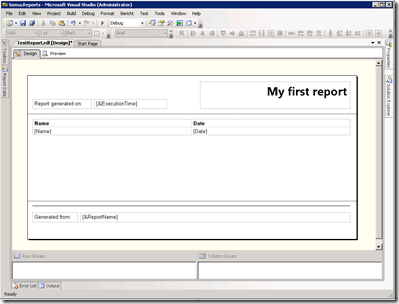
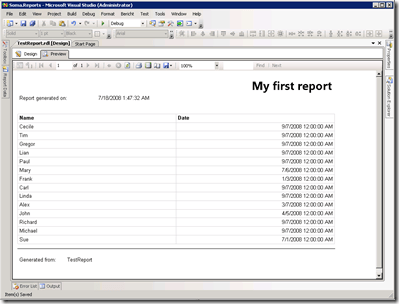
4. Design your report. You can add elements to the report surface, by right clicking on the center surface and select them from the insert menu. The most important are Header, Footer and Table. In the Header and Footer you can add Textboxes with text or by right-clicking on them and choosing expressoin you can choose some variable input. For example page number, report name etc. In the table you can drag columns from the “Report Data” (on the left showing the data source you just added). When you are finished, you might have something like this. Click preview to get a glimpse at what your boss might get.
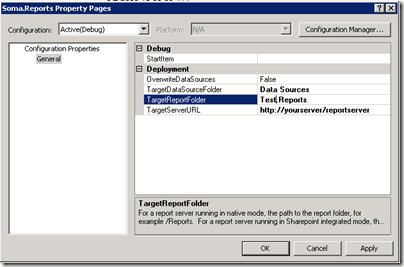
5. Now let’s deploy it to the report server. First we must set the report server url. Right-click on the solution in the Solution Explorer and click on Properties. You will see the following dialog. Change the TargetReportFolder value to something you wish and provide the TargetServerURL as http://yourserver/reportserver (not just /report!). Press save. Now right-click on the solution again and select Deploy.
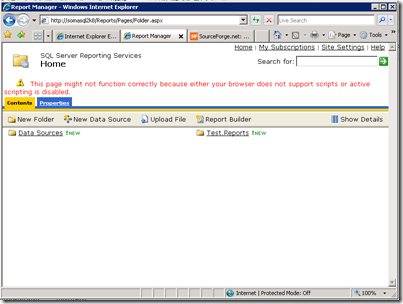
6. When it finishes open the url http://yourserver/report (not /reportserver!). You will see something like this. Go ahead and click on Test.Reports (or whatever you specified as TargetReportFolder) and then click on your test report. You will be greeted with the web version of your report.
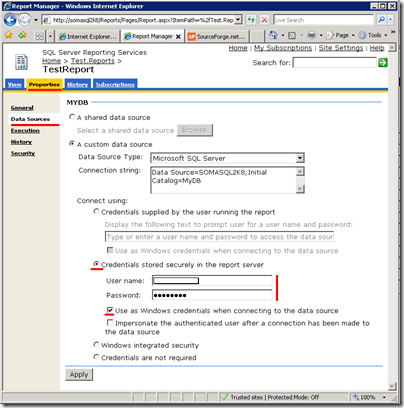
7. Now your Boss will not want to go the web page to get that report, so let’s look at sending it to him per email automatically. First we need to change the security settings for connecting to the data source. In the report page, click on Properties > Data Sources. Change the “Connect using” to “Credentials stored securely in the report server” and specify an account that has access to the data. Also check “Use as Windows credentials…”.
8. Now you can go to Subscriptions. Click on email. Don’t have email as an option). Once you have finished, lean back and let SSRS make your boss happy and in turn make you happy.
So we have seen the absolute basics of report creation. A quick and dirty introduction. This should cover your first encounters with SSRS. Hope it helps someone!
Stop reading here unless you are Troubleshooting…
Additional Tip #1:
I try connecting with SSMS (Management Studio) and it won’t connect. Maybe you renamed the server? Open RSConfigTool, go to Database > Change Database > Choose an existing report server database. Just choose the existing one, and let it run through it’s config. That should repair everything and you should be able to connect using SSMS again.
Additional Tip #2:
You don’t have email in the options for delivery in the subscriptions dialog? Probably it’s not configured. Thankfully that is very easy. You start the RSConfigTool. Connect and go to the Email tab. There you just specify a sender address and the SMTP server you would like to use. Click apply and voila. The server will automatically restart and the now the email option appears.
Additional Tip #3:
Saving the subscription results in an error message saying SQL Server Agent is not running. This is a DB or sysadmin issue, but just fire up SQL Server Configuration Manager (in the Start Menu under SQL Server 2008 > Configuration) then click on SQL Server Services, right-click on the SQL Server Agent > Properties. Go to the service tab, change Start Mode to Automatic and press OK. On the next reboot it will start automatically, but you still need to start it once for now. Right-click on the ‘SQL Server Agent’ and press Start.
Technorati Tags: Microsoft SQL Server Reporting Services