There are multiple ways to host static websites from Azure Storage Blobs to a custom domain serving HTTPS:
- Using Azure CDN: https://docs.microsoft.com/en-us/azure/storage/blobs/static-website-content-delivery-network
- Using Cloudflare: https://support.cloudflare.com/hc/en-us/articles/360021902391-Enabling-Cloudflare-SSL-on-Azure-Storage-Static-Web-Hosting-Applications
But if you want a bit more flexibility at less than 5USD/month cost consider using Caddy 2 (the HTTPS-by-default webserver written in Go) one a VM to serve your website. I will show you step-by-step how to get setup.
Setup Azure Blob Storage
In order to serve files from your blob storage create new storage account. The “account kind” must be set to StorageV2 (aka GPv2) to enable the static website functionality.
If you are only hosting the website from this storage account and will be pushing the files from a master source (e.g. GitHub) then replication can be set to the cheapest option: LRS.

Once the account has been created, open the resource in the portal and head to the “Static Website” section. If it’s not visible, your storage account is not set to “StorageV2”. You can upgrade it on the “Overview” page.
In the “Static Website” section, set to enabled, set your index page and press Save.

After saving your public endpoint will be shown:

Create a simple index.html file locally and upload it to the $web container (Created automatically when you enabled the static website) using the portal (in the Storage Account > switch to “Containers” > select $web and then use the navigation button “Upload file”).
Setup Azure VM
Create a new Azure VM image. I will be choosing the most economic option for this VM but you can upgrade later or enable any settings you feel strongly about.
I chose the default Linux image, but most commands in this tutorial will work for any flavor:

For a simple usecase the smallest VM size will work:

Before continuing set the username and password (use your auth key settings) you will later use to connect to the VM via SSH.
On the disks page switch to Standard SSD for the most economic option.

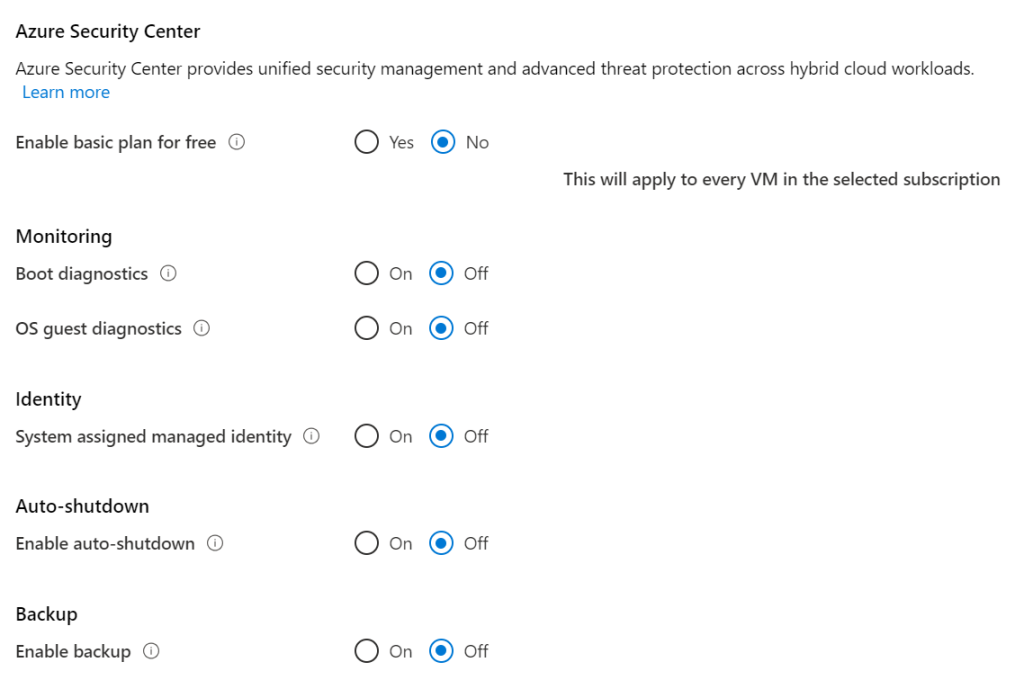
On the management page I have disabled all options in order to keep costs to a minimum.
All other settings are default and you can continue to create the VM.
Once created, head to the Overview page and click on the assigned IP.

Select it and on the following page, switch to a static IP so that this setting does not change when the VM reboots.

Either way start the VM now.
Configure your DNS
Head to your domain hosting provider and add an A record for the domain you’d like to user. I will be using http://www.example.com as a placeholder. Wherever you see that value below, replace it with your own domain.
Quick Intro to Caddy
Skip this if you just want to set it up, but I was made aware that Caddy may not be known to everyone. To put it simply, it’s a webserver that automatically gives you HTTPS for anything it serves. So it will handle all the SSL certificate creation and management (via letsencrypt) as long as you point a DNS name to the server it’s running on. Read more about automatic SSL here. Other than it has a host of different feature to get basic use cases setup quickly with simple configuration (often one liners) and it’s open source (written in GO). See more at caddyserver.com.
Setup Caddy 2
Connect to your VM using SSH (e.g. on Windows using Putty client).
The following commands are in part from the official installation documentation. You may want to check nothing has changed in the meantime.
First you want to update your package manager and package repository:
sudo apt-get update && sudo apt-get -y upgrade
Once completed you can proceed to download the current Caddy binary. At the time of writing this was release candidate 3 for Caddy v2. Find the most current URL at https://github.com/caddyserver/caddy/releases and replace in the following command:
wget https://github.com/caddyserver/caddy/releases/download/v2.2.1/caddy_2.2.1_linux_amd64.tar.gz
Then proceed to decompress the binary, move it to the bin path:
tar xvfz caddy_2.2.1_linux_amd64.tar.gz
sudo mv caddy /usr/bin/
Next you will create a group and user for Caddy:
sudo groupadd --system caddy
sudo useradd --system \
	--gid caddy \
	--create-home \
	--home-dir /var/lib/caddy \
	--shell /usr/sbin/nologin \
	--comment "Caddy web server" \
	caddy
Next you’ll want to fetch the default caddy.service file (to run Caddy as a systemd service) and move it to the appropriate directory:
wget https://raw.githubusercontent.com/caddyserver/dist/master/init/caddy.service

sudo mv caddy.service /lib/systemd/system/caddy.service
Create the default caddy directory and create the Caddy configuration file (i.e. Caddyfile):
sudo mkdir /etc/caddy
sudo nano /etc/caddy/Caddyfile
The contents of that file depend on what you want Caddy to do, but for the the reverse-proxy serving from your Azure blob storage, write the following to your file (replacing both the domain you want to use and the public endpoint of your Azure blob storage):
www.example.com

rewrite * {path}.html
rewrite / /index.html

reverse_proxy https://XXXXXXXXX.zX.web.core.windows.net {
    header_up Host {http.reverse_proxy.upstream.hostport}
}
The first line represents the domain that Caddy will serve.
The two rewrite rules will allow the URLs to skip the file ending (.html) and also specify the default document.
The third part configures the reverse_proxy module to fetch any requests from your blob storage. You will need to modify the host header settings that Caddy sends to the Azure storage which is configured using the brackets. You do not need to replace the {http.reverse_proxy.upstream.hostport} portion as it will be automatically set to the value you change your Azure blob storage url to.
To exit from Nano, hit CTRL+X and confirm with the key Y to write the file.
Next reload systemd, enable and start Caddy:
sudo systemctl daemon-reload
sudo systemctl enable caddy
sudo systemctl start caddy
You can check Caddy either by visiting your domain in a web browser or check for errors by issuing the following command:
systemctl status caddy
If you make any changes to the Caddyfile you will need to reload the configuration using the command:
caddy reload -config /etc/caddy/Caddyfile
Conclusion
You know have files served from Azure blob storage via HTTPS on your custom domain using Caddy.
Up until this point the same effect can be created more easily with Azure CDN, but using this approach you now have the full functionality of a webserver to support different use cases.
- Do you want to serve /blog from a WordPress instance instead, but the rest from blob storage?
- Do you want to compress or rewrite certain paths?
That’s all functionality you can’t necessarily do with AzureCDN or even Cloudflare.
